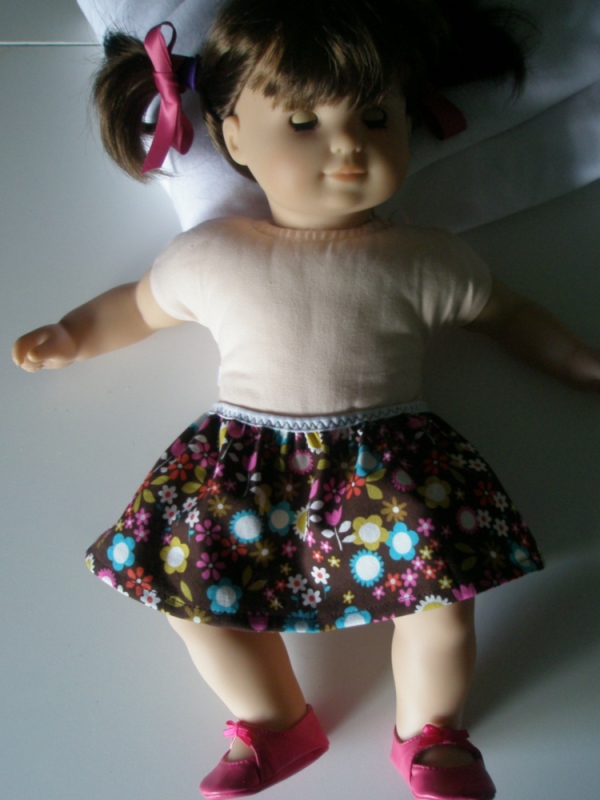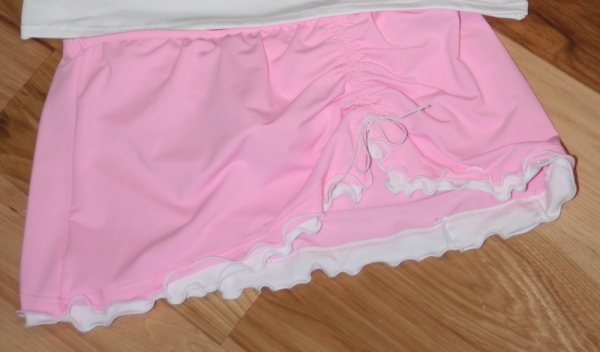
diy Gottex Swim Skirt tutorial

Avery Lane Blog: Swim Skirt Sewing tutorialSwim skirts seem to be all the rage this summer. I especially love the Gottex swim skirts, but not so much the price tag on them. Whenever I see them, I think, “I could make that.” Here’s how I did it…

Swim Skirt with front slit

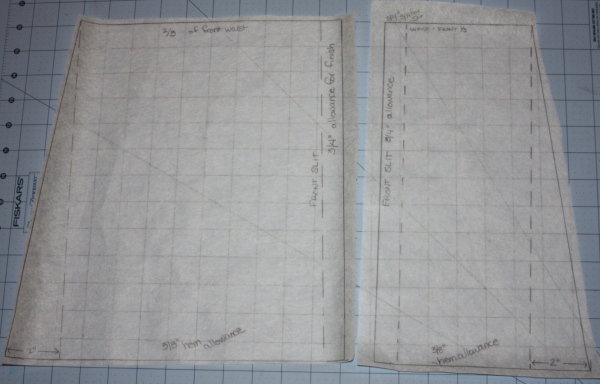
I want a front slit on my skirt, so I am using the back pattern piece from this tutorial and drafting 2 more pieces for the front of my skirt.

Take the waist measurement, subtract 1-4″ for negative ease. Divide that number in half. This is the front of my skirt measurement. Divide it by 3.

One side of the slit will be 2/3 of the measurement (Side A), and the other side of the slit will be 1/3 (Side B).
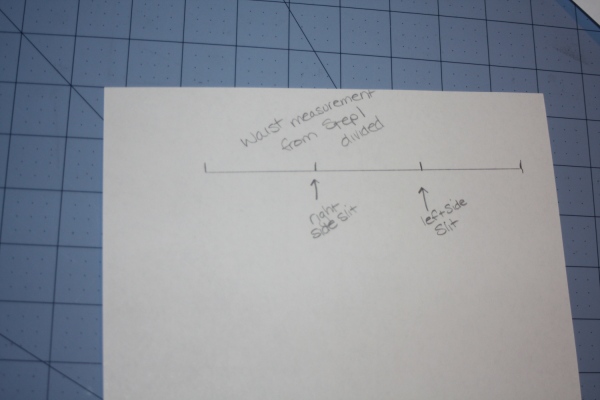
Avery Lane Blog swim skirt tutorial sewing

Side A(if more help is needed on these next few steps, see this post)

Step 1:
Add 3/4″ for finishing allowance to 2/3 of your waist measurement. Draw the top line this length.

Step 2
Draw a line perpendicular to the top line, the desired length. (same measurement as step 2 in the simple swim skirt drafting tutorial) and draw your bottom line perpendicular to the 2nd line you drew.

Step 3
Add 2″ along the bottom edge to make an a-line. Follow the instructions (step 3) from the simple swim skirt tutorial.Avery Lane Blog: Swim Skirt Sewing tutorial
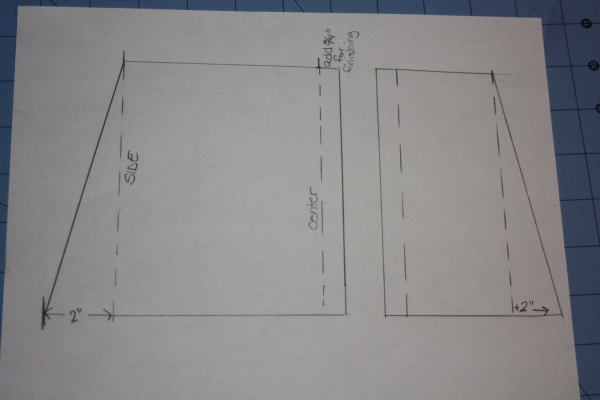
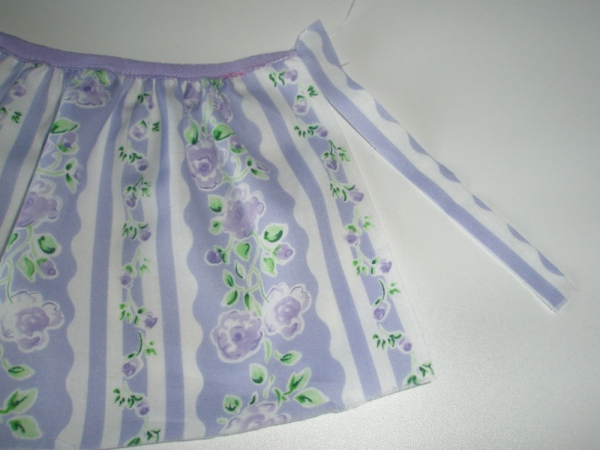
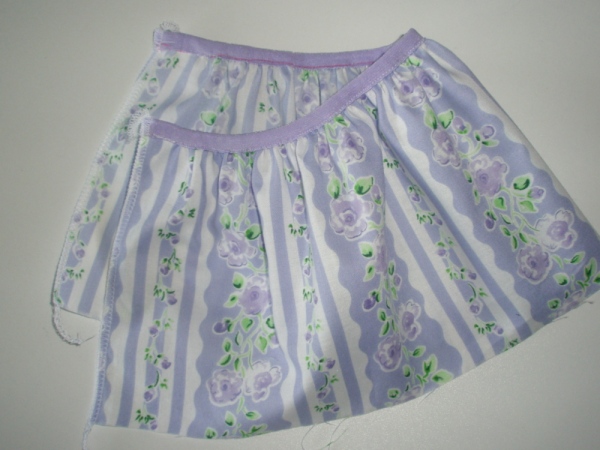
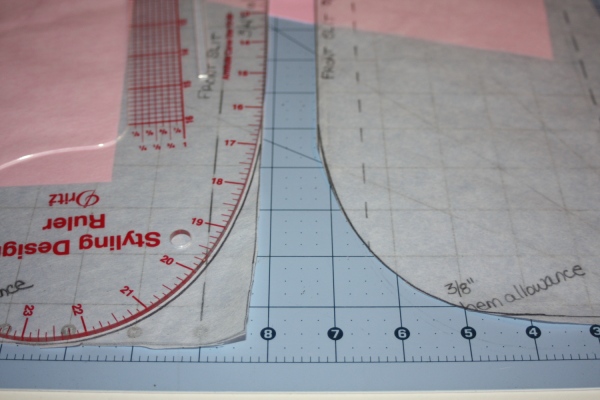
Repeat for Side B, using 1/3 of the front waist measurement and making it a mirror image of side A–so slit edges fit together, like this:
Avery Lane blog swim skirt tutorial

Use the patterns to cut out your fabric pieces.

Sewing a front slit swim skirt:

Step 1:
Finish the slit edges of Side A and Side B (fold the edge toward the wrong side and stitch in place).

Step 2:

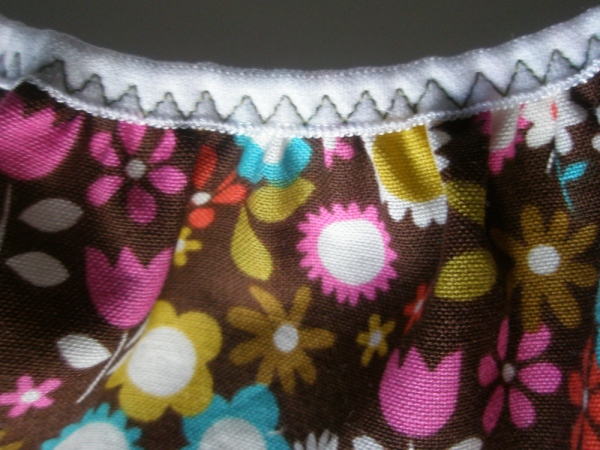
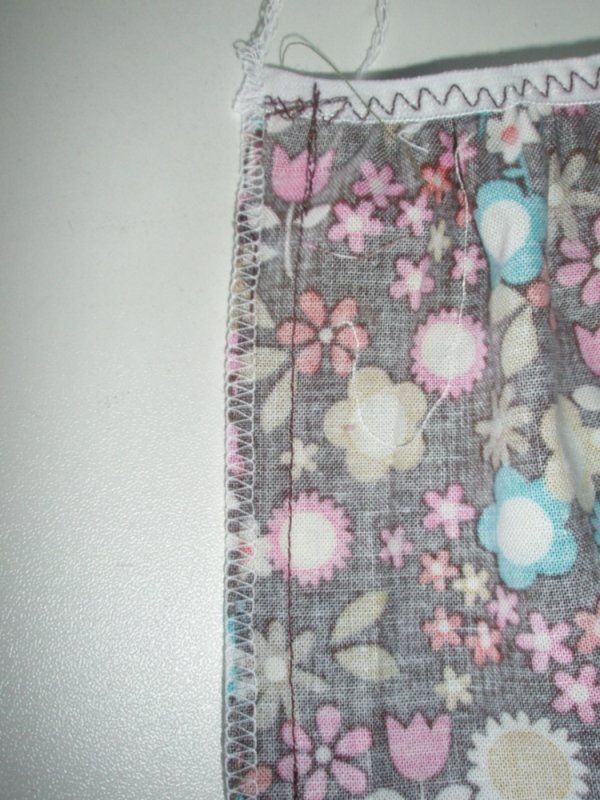
Optional: Sew a zigzag stitch along the top edge of the slits, tacking them together at the top edge.

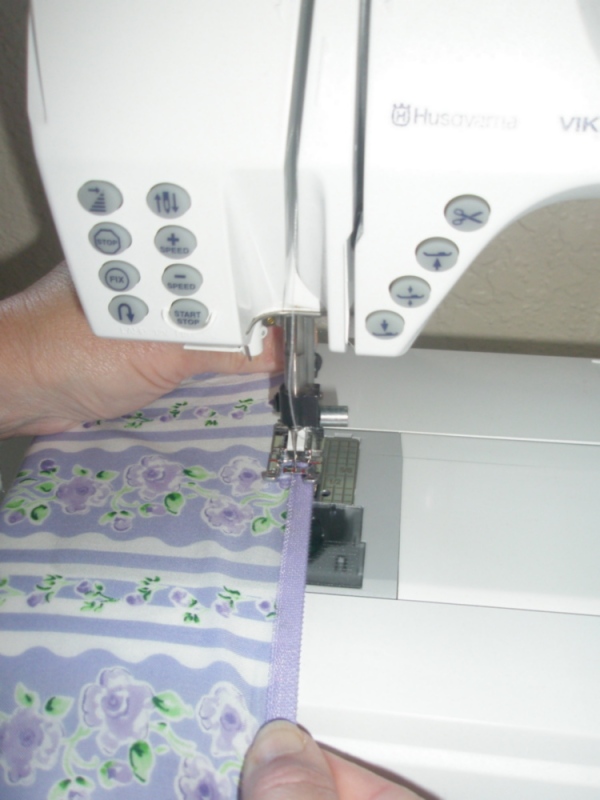
Step 3: sew side seams, waist, and hem (see swim skirt sew along here)

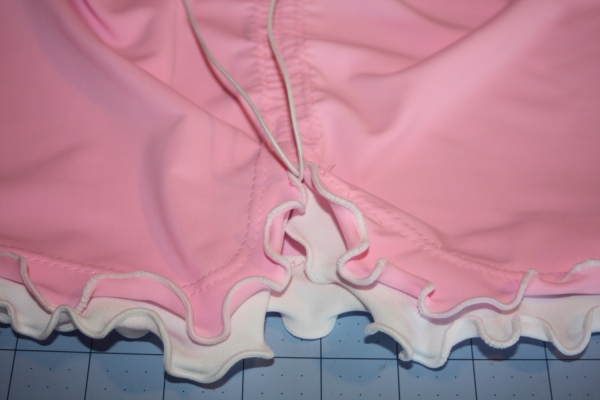
The Gottex Profile Ruffle skirt Knock-off:

Draft the pattern as direct for side-slit skirt above.
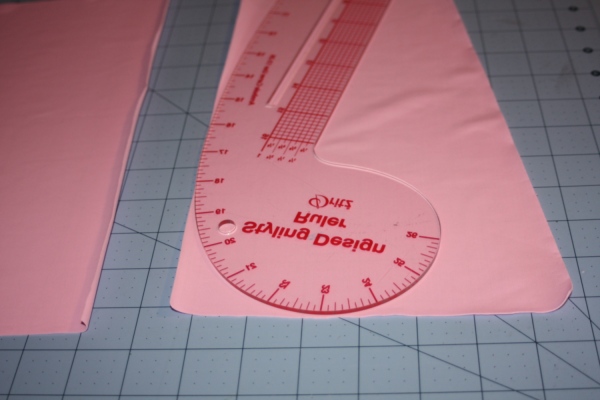
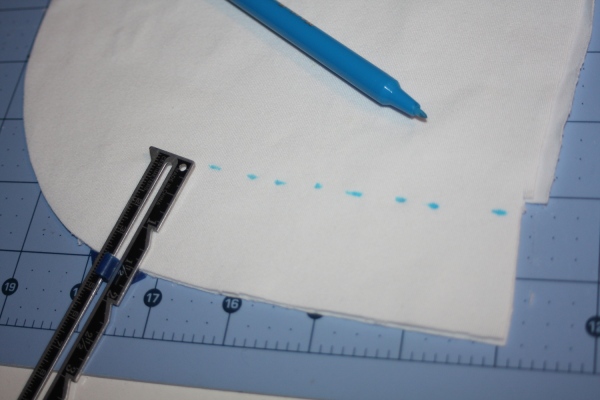
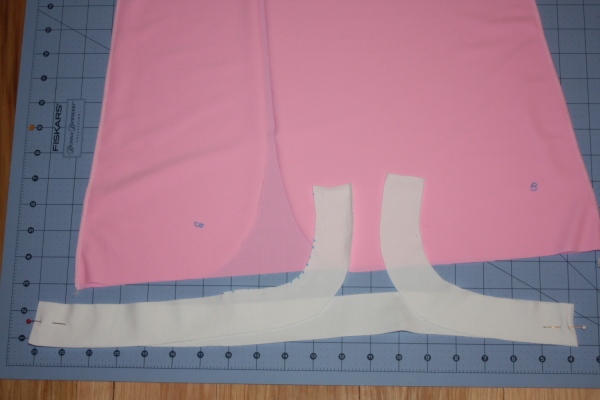
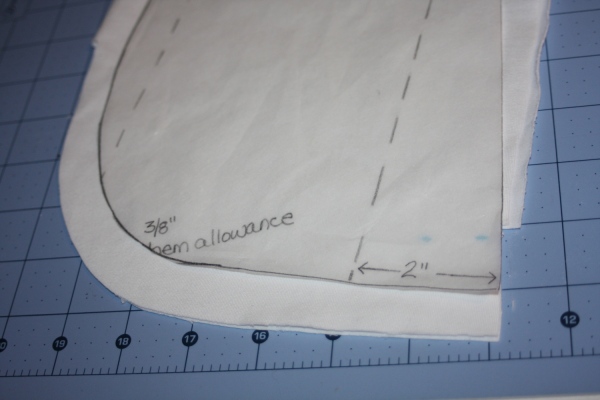
Step 1: round slits

Avery Lane Blog: Swim Skirt Sewing tutorial

Avery Lane Blog: Swim Skirt Sewing tutorial

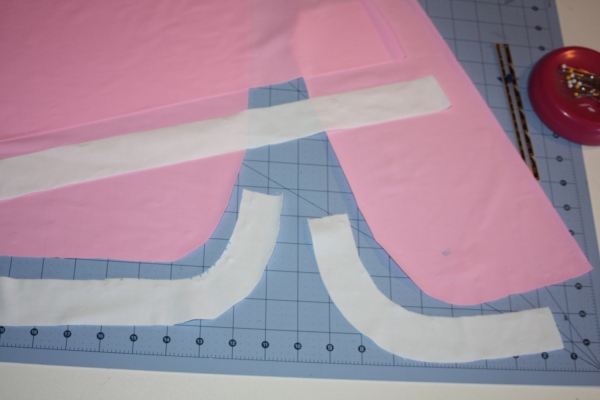
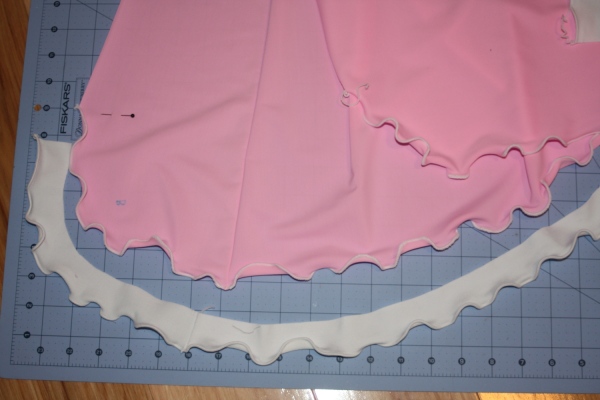
Step 2: cut out contrast fabric for double ruffle hem (optional)
Avery Lane Blog: Swim Skirt Sewing tutorial

Avery Lane Blog: Swim Skirt Sewing tutorial</a

Avery Lane Blog: Swim Skirt Sewing tutorial

Step 3 sew side seams of skirt and sides seams of ruffle trim.

Avery Lane Blog: Swim Skirt Sewing tutorial

Step 4 use serger to finish hems of both skirt and ruffle trim. Use wooly nylon thread in loopers and rolled hem setting. Stretch fabric slightly as you serge the rolled hem to create a lettuce edge effect.

Avery Lane Blog: Swim Skirt Sewing tutorial

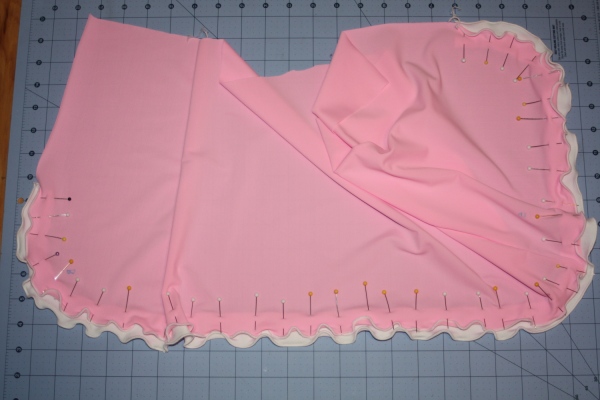
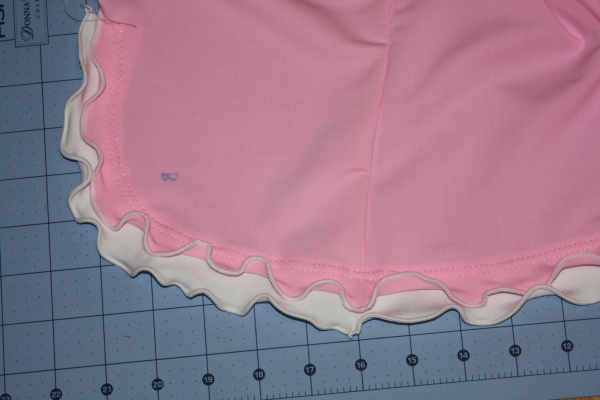
Step 5 sew ruffle to skirt, so that both ruffle and skirt have right side of the fabric facing up. Use a twin needle to sew them together.

Avery Lane Blog: Swim Skirt Sewing tutorial

Avery Lane Blog: Swim Skirt Sewing tutorial

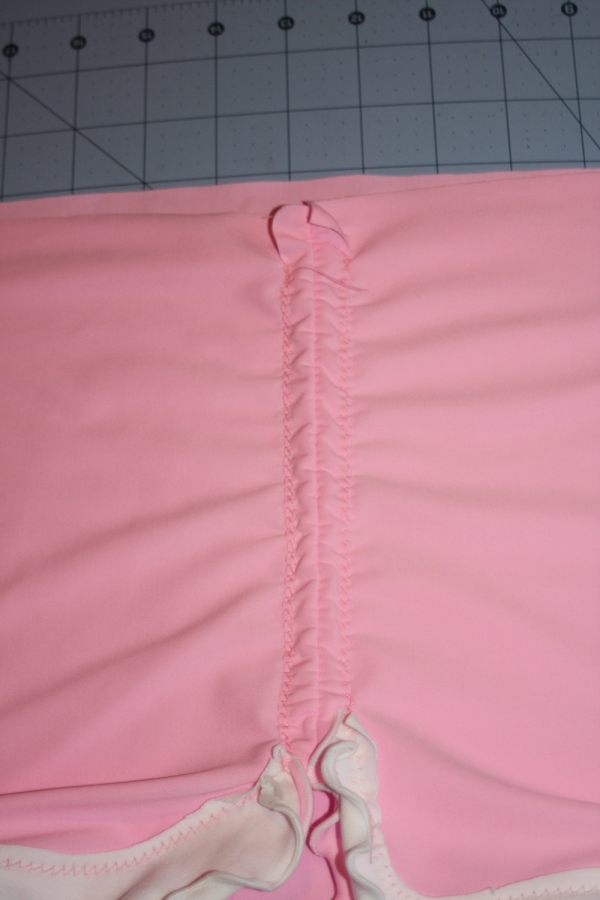
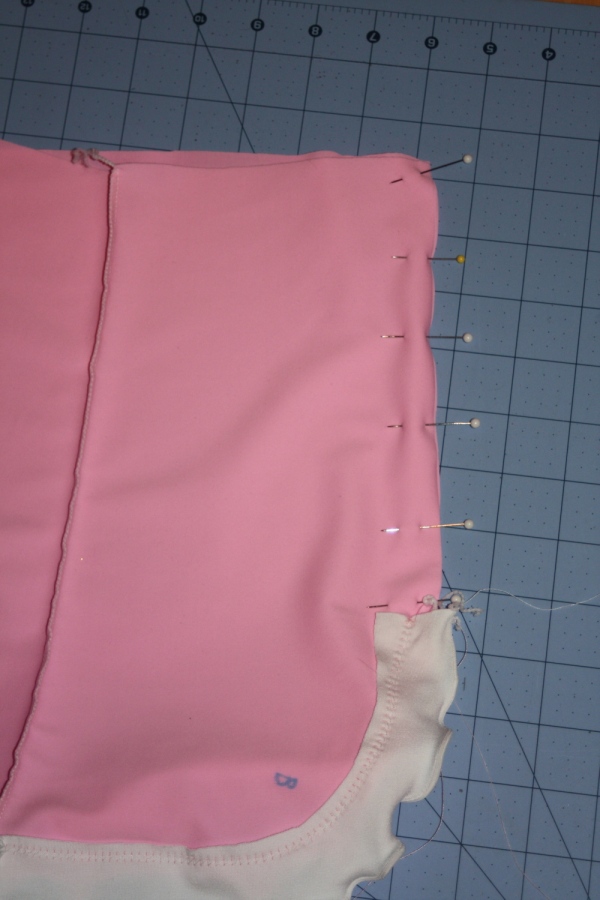
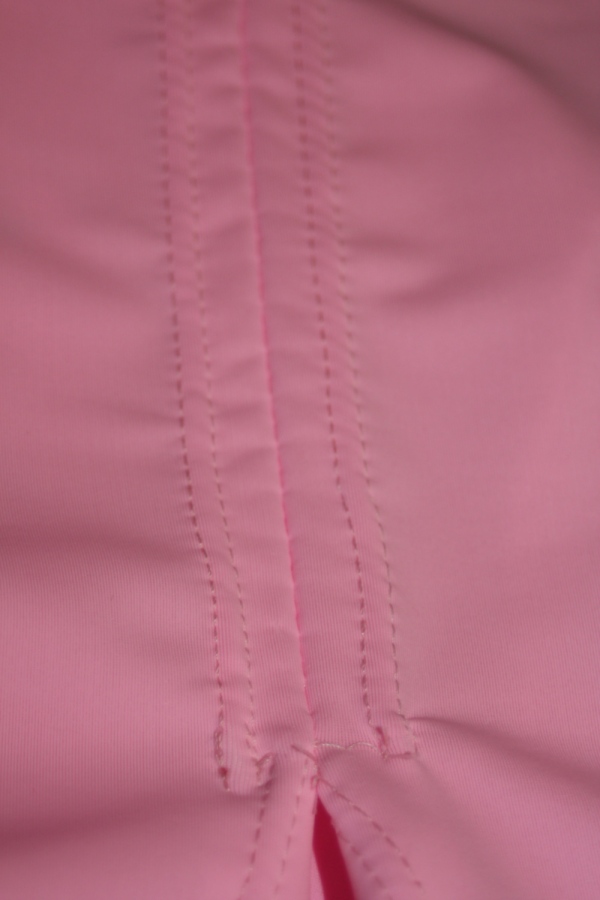
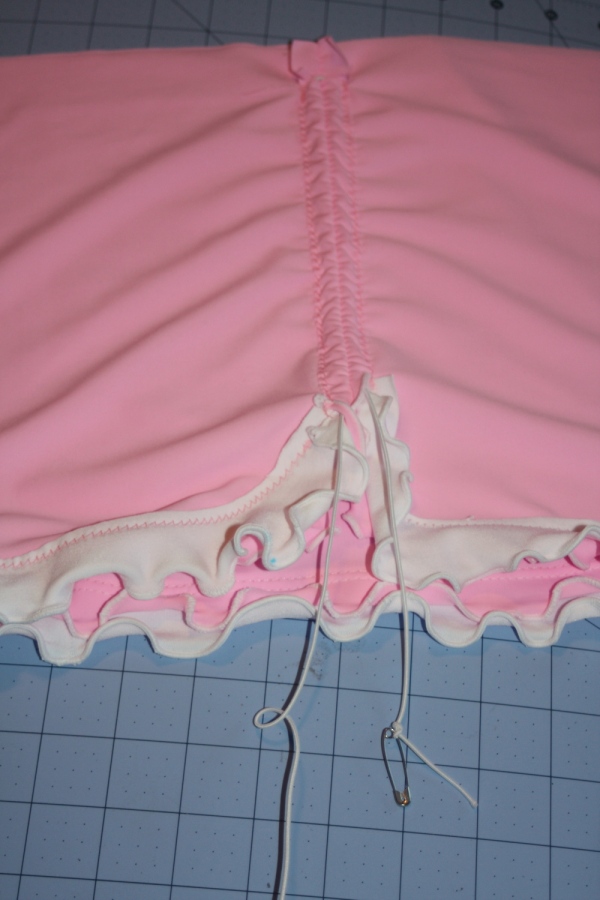
Step 6 sew side front seam using a stretch stitch or narrow zigzag stitch. Use a 3/4 inch seam allowance. Use a twin needle to sew the seam allowances open and create a casing for drawstrings. Don’t sew to the very top edge, stop and leave about 3/4″ unsewn. Clip the seam allowances right above the casings.
Avery Lane Blog: Swim Skirt Sewing tutorial
b2
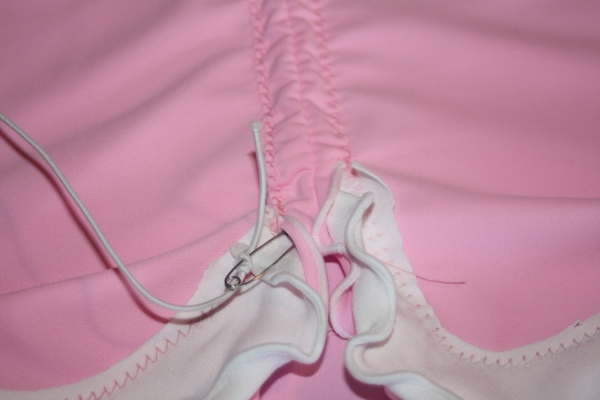
Insert stretch cording into bottom of one casing and feed it through to the top, down into the 2nd casing and all the way out the bottom edge of 2nd casing.
Avery Lane Blog: Swim Skirt Sewing tutorial

Avery Lane Blog: Swim Skirt Sewing tutorial

Avery Lane Blog: Swim Skirt Sewing tutorial
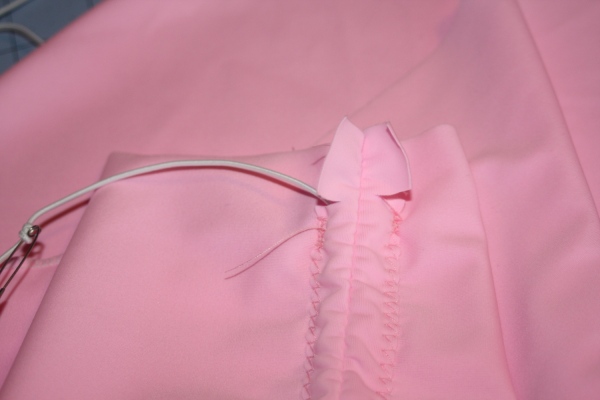
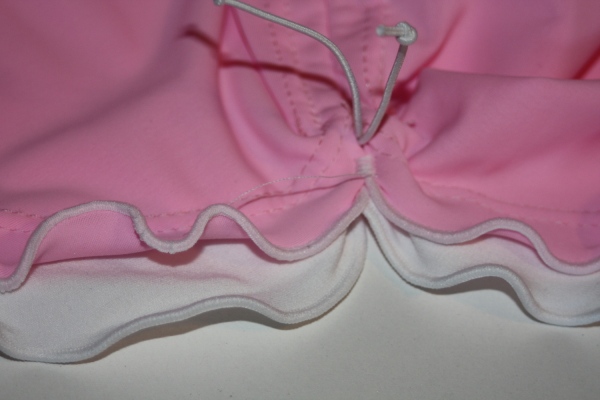
Step 7 Pull both ends toward the right side and pull them up and out of the way. sew across the opening with a zigzag tack to keep the cording to the front.
Avery Lane Blog: Swim Skirt Sewing tutorial

Avery Lane Blog: Swim Skirt Sewing tutorial
Now either add elastic to finish the swim skirt or baste the skirt to bottoms for a skirted bottoms.

Using bottoms and sewing attached bottoms:
If you are sewing a swim skirt with attached bottoms, you’ll need the waist of the skirt to match the waist of the bottoms. To do this, use your swim bottoms pattern. You should draw the top lines the same length as the top lines on your swim bottoms pattern. Then follow steps 2-4 for the rest of the drafting. OR you can add to the waist measurement and stretch the bottoms to fit the skirt when zigzag stitching the skirt to bottoms in preparation to add elastic to the waist.

To sew your swim skirt with attached bottoms:
sew both the skirt and the bottoms up until sewing the waist/adding elastic to the waist. Once you’ve sewn all other steps, place the bottoms inside the skirt, so the right side of the bottoms are facing the wrong side of the skirt. Match the side seams together and pin together, keeping raw edges even.

Baste them together with a zigzag stitch.

Add the elastic just as you would for a swim skirt or swim bottoms by themselves, but you will be sewing the elastic to both the skirt and the bottoms at the same time.

Other tips:
Use stretch needles 🙂

For the elastic, cut it about 1-2 inches less than the waist of the skirt. I use 3/8″ wide elastic.

If using a serger, use wooly nylon in loopers and regular serger thread in needle.

3 thread overlock stitch is best and offers the most stretch (if using a serger).

I try to make a trial run first with some less expensive fabric. This way I can see if I need to adjust things, without feeling like I’ve wasted my good fabric. Clearance fabric is great for first attempts.

A very long post with several sewing tutorials (Sorry it’s so long)–I hope it was helpful 🙂
~Erin

Seasonal Designing: Teacher Gifts, Summer Reading Programs, and Sewing Classes

I am teaching several sewing classes throughout the summer and have been designing some projects for them. I always feel like this local shop has new and unique examples hanging around and I wanted to be consistent with their style. It can be challenging to come up with cool designs to teach beginning sewists.

I kept coming back to this idea of a book shelf quilt that I had seen years ago, over at Don’t Call Me Betsy Blog. I really love the look of her quilt and thought the use of those selvages was way cool 🙂 I’m so glad that I bookmarked her blog post. She has a great blog, btw, and a new book coming out this fall (wtg!) I remember seeing a book shelf bag on a sewing forum last year (?or the year before that?), but I failed to book mark it and can no longer find it. Isn’t that the way it is? Most often, when I finally want to make it, I can’t find that internet-based-inspiration I need to make things easier. And yeah, I checked–not on my pinterest lists either.

The more I thought about this bag, the more possibilities I could see for it and the less likely that I could let it go. I thought it would make a perfect project for the beginning class for grown-ups that I’m teaching, so I adapted this idea into a bag. But I needed to make it easy for beginners and reduce the amount of steps for time’s sake.

So I got really excited with the idea of using this style for toting library books back a forth this summer–we always go more often: more time and because my kids participate in the summer reading program. I thought of all those books fitting into my awesome bag and I got a bit carried away…just a bit. I neglected to consider its weight…I made this ginormous (is that a real word now?) bag and thought “omg, duh.”

Avery Lane Blog wordpress Leaning book shelf bag sewing pattern

Meet our new book shelf pool bag–bc this is way too embarrassing to gift to someone.

After several complicated versions, this is what I’ve come up with for the class, which I’ve also made available in my pattern shop.

Avery Lane Blog wordpress Leaning book shelf bag sewing pattern

And then a sample project to hang in the shop.
Avery Lane Blog wordpress Leaning book shelf bag sewing pattern

My daughter wants one for herself, which I feel is such a genuine compliment. I might make her bag with the selvages like Elizabeth over at Don’t Call Me Betsy did. I also plan to make some as teacher gifts this year. I always try to come up with crafty ideas that also have some practical use. Our town has banned plastic grocery bags (yay!), so we can all use more reusable bags. And most of my kids’ teachers have young kids, who no doubt will need their own bags for their load of library books.

What are you giving the teachers this year? I’d love to have more ideas for future crafting and gifting 🙂
~Erin

A Lined Backpack– just for teens

Teaching teens to sew can be a challenge, because most teen girls want to sew clothing. As a teacher, I want them to be happy with what they’ve sewn. If they like what they’ve sewn, it motivates them to sew more and build on their skills. Clothing as a first project for teens most often doesn’t work well for a couple reasons.
1. the style they can master is not usually very stylish
2. clothing isn’t very forgiving and can look/fit awkwardly if not sewn precisely

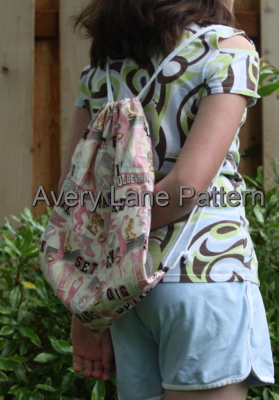
Accessories are the perfect solution 🙂 There are several accessories that work well for beginning projects. With summer in mind, I designed this lined backpack for a class I teach locally. It’s a perfect first project for teens and adults, who are just starting out. And it pretty much always looks good and is something that gets used a lot by the sewist.

Another key to sewing success for teens and younger kids is fabric. Allowing kids and teens to choose the fabrics for themselves makes the project personal. They will be more likely to feel good about the project, as well as use it.
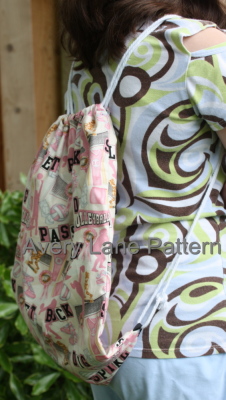
Avery Lane Blog drawstring backpack pattern

I used this brilliant fabric from RJR fabrics. It’s perfect for the sporty girl 🙂 The collection has soccer, softball, and cheerleading prints as well.
Avery Lane Blog drawstring backpack pattern

Through my etsy shop, a lot of people contact me wanting a lined drawstring backpack pattern, so I came up with one. It’s now worked out and available for purchase. My Cinchy Cinch Sack, which is an unlined drawstring bag, is still available and great for younger sewists to sew as one of their first projects. I will be teaching both bags this summer in a local sewing shop. It’s great to have choices!

~Erin

A New Kid: Young Image Sewing Magazine

Not exactly new, but relatively new: Young Image pattern magazine focuses on girls, sizes 80-164 cm. I had been tempted to buy an issue for a while, but there’s not much in the way of  peer reviews online about the patterns. I have a tween and these designs looked pretty stylish. She is very particular and style is everything–if you have a tween, then I’m sure you get this. So when the opportunity presented itself, I purchased a single issue.

Avery Lane Blog Young Image pattern y1111 Summer 2011 issue

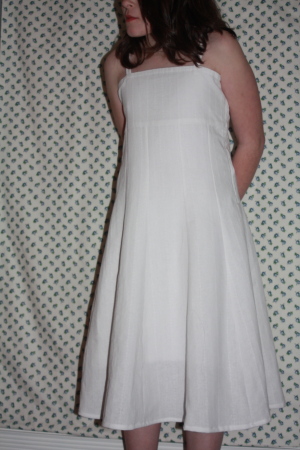
My daughter wanted a dress-first time in over a year <jaw drop>, so she sat down with all my pattern magazines. She picked one: (y1111) from the Young Image Summer 2011 issue that I had bought a little while back. She made a few changes, as she usually does, and I set to work. As I traced her size, I started to become concerned with sizing. This is an empire waist dress with a 10 gore skirt attached (think Feliz or Elodie on the skirt), so I was most concerned about the bodice and traced the size according to her chest measurements. It has a side zipper, so it is not designed to be an easy fitting or loose dress. That said, the photos in the magazine of the design did not show a tight fitting dress either.

The magazine has nice designs. The patterns are printed on pretty thin paper though. The instructions were mostly clear, but not all that descriptive and some of it seemed to be lost in translation. Evidently the English word “pass” means “yoke”  and to make a strap, one must stitch the strap “double.”  Here’s another that had me scratching my head: “reef the bow through the tunnel and stitch it at the zipper,” which I take to mean: insert or feed the drawstring into the casing, work it through until it comes out the other end of the opening in the casing. Stitch drawstring in place at the zipper. It seems they could have done better translations for clarity and to be helpful to the beginner sewist. The design was pretty straight forward, so I didn’t really need/use the instructions. But if I was new to sewing, I may have been very frustrated.

The pattern pieces weren’t as clear as they could have been either; the only markings were in a foreign language–or just letters like “RVD/FL” and “MV/VM”. Evidently, “MVSTOV/VMSTOFBR” means fold line. Thankfully, I found some help here in this sewing glossary for European pattern sewing. (cause Babylon and Google translate were absolutely no help)

The fit was tight, tight, tight, and so the first fitting was interesting. The bodice (or pass as they were calling it) fit perfectly. What I had not thought about or planned for was the hips. The photo in the magazine does NOT show a fitted style skirt, but that skirt was fitting like a glove. The weird thing—it fit everywhere until an inch or so below her natural waistline.  I fixed the fitting problem with a gusset, which matched well with the 10 gore skirt style anyway.

I think this would not be a problem on a younger child or a really straight up and down, skinny kid. If I sew this again (a big if), I would shorten the gore pieces along the top, so that it would still fit the bodice, but begin its flare sooner. This would make the skirt wider when it reaches the hips. The way it’s drafted, the flaring begins at or below the hips, which the photos in the magazine don’t really illustrate.

Avery Lane Blog Young Image pattern y1111 Summer 2011 issue

The back view:

Avery Lane Blog Young Image pattern y1111 Summer 2011 issue

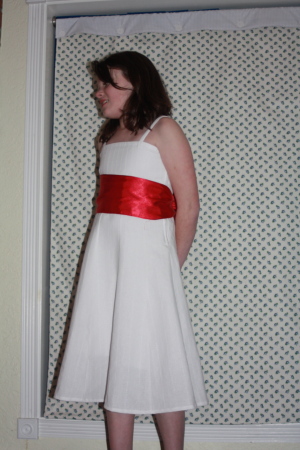
My daughter loves the dress, which I suppose is the only thing that matters, at least to me. Here she is with her satin sash, which was part of her master design 🙂 I think the dress looks stylish and classy on her.

Avery Lane Blog Young Image pattern y1111 Summer 2011 issue

As far as my review for the magazine and its pattern, I’m not sure I will be purchasing another– At least not today. I have only sewn the one design and will attempt at least one more before giving up. I do think the translation to English could be improved a lot. The pattern pages could be printed on more substantial paper and they should include English markings for clarity. There were no pattern pieces for the straps–not a huge deal for me, but maybe  for a beginner.  Nor were the size/measurements given to cut  out the strap pieces.

The magazine states on its cover: “instructions are understandable” and “suitable for beginners,” but some of the wording is odd. Some basic info is omitted in the instructions for the pattern I sewed up, information such as right sides together or wrong sides facing together. For a beginner, this is not going to be obvious. This pattern in particular has an overlay, which would need to be placed its wrong side facing the right side of main skirt piece. Omitting this info is not good to do, imo, especially if one is claiming that the pattern is “suitable for beginners.” I personally would not recommend this magazine to any beginner.  <<But>> the designs are so trendy and ideal for tweens, so I will be giving it another try and post about it.

Have you sewn up an Young  Image pattern? If so, please do share your experience and insight. It helps to have online reviews before sewing a new pattern. It’s usually where I begin and I wish there were some out there for this magazine.

~Erin

Update:

Changes I made: lengthened to below the knee and did not make the overlay. I made the bodice plain–without the drawstring and slit opening.


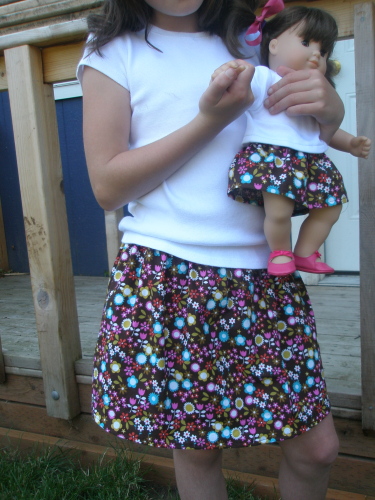
Sweet Little Skirts for Me and My Doll, a free tutorial from Avery Lane patterns

A sweet little skirt pattern tutorial from Avery Lane, make one for a little girl in your life and another for her dolly. These take very little time and are super cute.  Great for  quick gift giving!

Avery Lane pattern

●▬▬▬▬▬▬▬▬▬●✿ Sweet Little Skirt ✿●▬▬▬▬▬▬▬▬▬●

Here’s what you’ll need:

For an 18 inch doll:

cut a piece of woven fabric 5 ½ inches long by 21 ½ inches wide

1 piece of 3/8 inch fold over elastic 10 ½ inches long

optional: 5 inches of hook and loop fastener (such as Velcro)

15 inch Doll (such as Bitty Twin):

cut a piece of woven fabric 4 1/2 inches long and 21 1/2 inches wide

1 piece of  3/8 inch fold over elastic 11 1/2 inches long

optional: 4 inches of hook and loop fastener

For Little girl sized skirt:

✿ Skirt fabric: Measure from waist to the hem line on the little girl. Be sure to measure the place along her waist where she wears her skirts—for example: my daughter always wears her skirts a little below her belly button, so I would  measure around her waist a bit below the belly button. Measure to the desired length and add hem allowance to this measurement. For example a narrow hem only needs ½ inch for the hem allowance, so for my daughter whose finished skirt length is 12 inches and I would cut my fabric 12 ½ inches long. If you like more hem allowance, then you would add more to allow for hemming the skirt.

Cut your fabric the width of the fabric or 42-44 inches wide. So for my daughter I cut my fabric 12 ½ inches long by 42-44 inches wide.

✿Waistband: Measure your little girl’s waist, again where the little girl wears her skirts. Subtract 4 ½ inches from this measurement. For example: my daughter’s measurement is 24 inches, so I would cut my fold over elastic 19 ½ inches. This will fit in such a way that the skirt won’t easily slip down and won’t be too tight or uncomfortable.

For larger sizes, you should add more fabric. For example: a teen or adult  sized skirt should begin with double the width of fabric (88 inches), to be able to stretch the fold over elastic and have  enough gathers for a pretty skirt.

For doll skirt you can either add hook and loop fastener to back (method 1 for back closure), or sew a pull on skirt (method 2). For child’s skirt, follow instructions below beginning with step one and continue with method 2 directions, for the pull on skirt.

Step One

To begin, determine if fold over elastic has a wider side when folded. If so, when you sew the fold over elastic waist band have the more narrow side facing up (stitch directly onto narrow side to ensure the underneath side catches). You should work with the right side of the fabric facing up for best results.

avery lane blog

Pin the edge of fold over elastic to one edge of fabric, so that you are attaching the fold over elastic to the long side of the fabric (the shorter sides are the center back and the length of the skirt – that would be 5 1/2 inches for the 18 inch doll skirt). If your fabric is directional, make sure you are attaching the elastic to the upper edge. You will fold the fold over elastic in half and place the fabric in the center of the two sides of the fold over elastic (sandwiched in between the folds of the fold over elastic). Stitch for about ½ to ¾ of an inch, so that there is enough fabric behind the presser foot to hold onto.

avery lane blog

Now you will stretch the fold over elastic as much as you can. Keeping the fabric in between the folds of fold over elastic, hold in place on both sides of the presser foot (shown in photo below), keeping the fold over elastic stretched, and sew the fold over elastic to the upper edge of fabric, as shown. As you sew, make sure the fabric stays inside the two folds of the fold over elastic. Don’t pull the fabric through the machine, allow the feed dogs on the machine to move the fabric as it should. You are just making sure the fold over elastic stays stretched and is fed into the presser foot/sewing machine straight.

avery lane blog

When I try new techniques, I like to practice on scrap fabrics before attempting it on my project fabric. You may try on some small scraps to get a feel for what you will be doing if this is new for you.

✿You can sew using a straight stitch, broken or multi-step zigzag stitch, or a regular zigzag stitch. Zigzag stitches are easier for most beginners, as it’s easier to make sure to catch the fold over elastic on the bottom this way. I like the look of the broken zigzag stitch 🙂 Here is what the waist band will look like with a broken zigzag stitch:

avery lane blog

✿You will need to stop when your hand in the front reaches or nears to the presser foot. Make sure the needle is down, inside the fabric, when you stop. Readjust your grip, tucking the fabric back inside the fold over elastic if necessary, and continue sewing once you have a grip on both the elastic and fabric again.

Continue in this way until you are about 1 inch from the end of the fold over elastic. You will not need to stretch beyond this point, just make sure fabric is still tucked inside the fold over elastic.

Trim off any fabric not sewn into the fold over elastic.

avery lane blog

✿Two methods for finishing the skirt from here ✿

Method one is an open back skirt, using hook and loop  closure.

Method two is a pull on skirt design.

●▬▬▬▬▬▬▬▬▬●✿Method One✿●▬▬▬▬▬▬▬▬▬●

Finish center back edges with a serger or zigzag stitch.

avery lane blog

✿To Hem: Fold over ¼ inch toward inside of garment (toward wrong side of fabric) and press. Fold over again ¼ inch and press. Use a long, straight stitch to form hem.

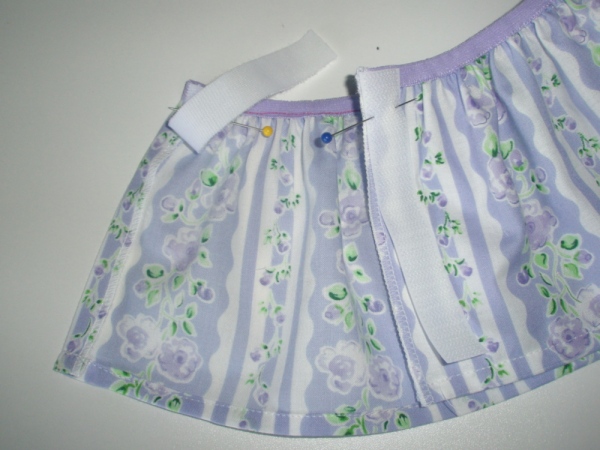
✿Back Closure: Fold over one side of center back and press with hot iron. The other side will remain unfolded. Cut a piece of Velcro the length of the skirt (from top of waistline to hem).

Make sure the scratchy side of hook and loop (hook side) narrower than the soft (loop side). I use ½ inch wide for the soft side, and 3/8 inch for the scratchy side. This way the scratchy side is completely enclosed and the doll hair is less likely to get caught in it during playtime.

✿If you serged the center back edges, then tuck the serged thread chains under the Velcro. This keeps your dress/top looking neatly sewn.

Sew around all four sides of Velcro.

avery lane blog

averylane blog

Avery Lane pattern

●▬▬▬▬▬▬▬▬▬●✿Method Two ✿●▬▬▬▬▬▬▬▬▬●

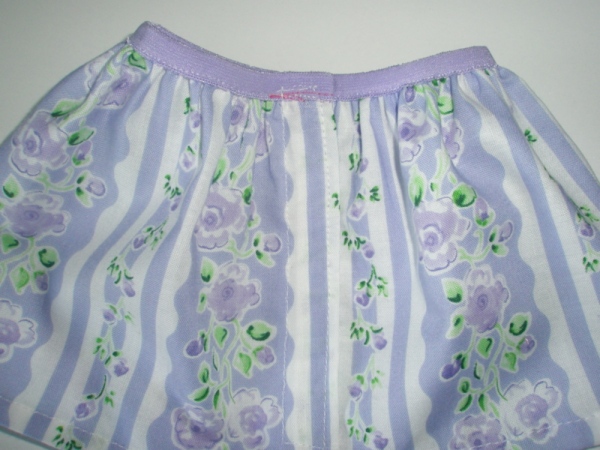
With Right sides together, pin center back edges together. Pin in place and sew the center back seam using a ½ inch seam allowance. Finish raw edges using a serger or zigzag stitch. Press seam allowances to one side. (optional: with sewing machine or hand needle, tack the seam allowance in place along just the waistband.

averylane blog

✿To Hem: Fold over ¼ inch toward inside of garment (toward wrong side of fabric) and press. Fold over again ¼ inch and press. Use a long, straight stitch to sew hem.

Avery Lane pattern

Hope you enjoy sewing this sweet little skirt!

~Erin

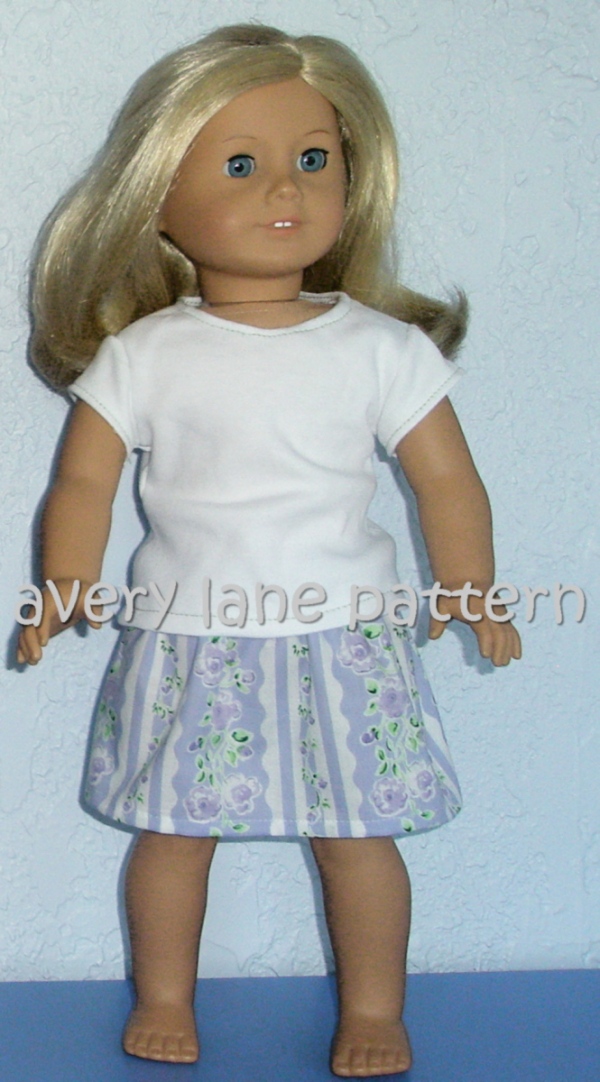
Tiny Tee shown on American Girl Doll is wearing a tiny tee–sewing pattern available here 🙂 Bitty Twin doll is wearing the Audrey Tee pattern available here 

The Burgundy Coat

Each year my daughter looks forward to winter, because it means a new winter coat, and another opportunity for her to design her own. This year being no exception. The coat has been talked about for months now, but she has no idea I have started. She had said back in September that she would like red this year. Wow, a bold color indeed. As I tried to talk her into a more neutral color, she explained that it’s a burgundy color she must have. She got a hold of my Ultimate 3-in-1 Color Tool and studied color. I’m very glad she did, because her picture of red did not match the red or burgundy  I imagined sewing up.

In secret, the search began for the exact burgundy (maroon may better describe her color choice). She loves wool coats, and when we settled for a blend or a different fabric, we were both sorely disappointed.  So wool it had to be and I did not want to risk buying it online this time.  The feel, hand, and color are so key in coats–and can be so personal. Remembering the book “The Purple Coat,” by Amy Hest, I respected her choice. I also wanted the coat to be a happy childhood memory. Something she may one day reminisce about. Or maybe that’s my vanity talking.

Picture from Amazon.com

The search for the correct shade of burgundy took me miles away, but well worth the trip. The color is spot on, and the wool is the softest wool melton. I’m using Jalie 2680. So far the project is going smoothly. Sometimes I wonder how much of our sewing has to do with the tools we use. Without the proper tools, sewing can be a frustrating, exhausting experience. Sometimes not having the right tools can sabotage a sewing project, no matter the sewist’s skill level, no matter the effort.

For this project, a walking foot, sometimes called an even feed presser foot, is vital. The melton wool has nap and substance. The best practice a sewist can employ is sewing a test seam before sewing a stitch on her project.  Starting with a fresh, new needle is another key element to sewing. After putting in a new needle, a needle carefully chosen for the fabric,  sew a few seams with scrap fabric. This will illustrate what the fabric is going to do. Melton slips and shifts, despite pinning it in place. The walking foot keeps the top layer from moving under the presser foot differently than the lower layer. It moves them together, evenly.

Still contemplating the lining–or rather whether to line it or not. I was not able to find a  matching floral flannel –(yes, I know. I should use a slippery fabric to line at least the sleeves, but she insists on flannel. It is her coat and as long as she likes it, then why does it matter?) or one that isn’t a cutesy little girl print. Could not find any burgundy flannel to match at all. I found a navy blue flannel, which I think she will like and sweet buttons to match, but I hate to cover up that cozy wool. The wrong side of the fabric is luxurious, much softer than flannel. The only draw back for me is the exposed seams. Jalie did not draft this coat pattern with a lining, nor did she talk about possible seam finishes.   Lots of top stitching, which I love, however, I hate the unfinished look of the inside. Flat felled seams would perhaps be bulky and uncomfortable. My daughter has been known to completely reject garments that don’t feel right.

I keep sewing, debating and contemplating this decision. Having already drafted and cut out the lining, I think I will decide at the very last possible moment.

Yesterday, I ignored the pattern’s pocket instructions. The Jalie instructions just didn’t seem right to me. The Ottobre coat from a few years back was almost identical in style and detail, so I did the Ottobre method. She loved that coat *sigh*

Today, I will be constructing bound buttonholes. After said buttonholes are completed, I will hopefully have made a decision about whether or not to line the coat.

Feel free to make your opinion known 🙂

~Erin

Sewing for Petites

Okay, I’m short. And I don’t like fitted tees. I like a little roominess there. Unfortunately for me, it’s hard to find that nowadays. T-shirts in my size are too fitted for my taste, and the shirts that are a bit looser fitting have ginormous shoulder widths, and the shirt hangs on me like a bad …well, it just looks sloppy, awful, and very sad. Patterns sometimes aren’t much better, but at least I have some control. I can adjust the width of the bodice, without adding more to the width shoulder seam. Or in this case, I found a bust and waist width I like, so I am making the shoulder seam shorter, thus narrowing the shoulder width, to fit me exactly. Which I think is easier to do than to add width to the bust/waist.

How to Adjust a Shoulder Width on a Pattern to Be Narrower

Step 1: First determine how much you want to narrow the shoulder width by. Measure along the top of your shoulder, to determine how wide you want your shirt’s shoulder seam to be, and compare it to the pattern.

Step2: On the bodice front: Make a mark 1 ½ inches to 2 inches in from side along shoulder.


Step 3: Make another mark about 1/3 to ½ the way down the armscye (or arm opening).

Step 4: Use a clear straight edge/ruler to draw straight lines from these marks to where they meet.

Step 5: Cut along the lines.


Step 6: Pivot the cut out piece, keeping the inside lower corner in place.

Adjust until the shoulder cutting line measures the desired amount, or is decreased by the amount you determined it needed to be decreased by in step 1.

Step7: Tape the pivoted piece in place. Draw a new cutting line for shoulder and a new cutting line for armscye. Do this by following the angle of the neck side of shoulder and continue across to the outside/armscye, as shown.

For armscye, draw a new cutting line, connecting the lines on either side of the opening.  You may want to trace the new, adjusted pattern, as shown.

  • Repeat for bodice back, so that the new shoulder widths will match in length.
  • If you have adjusted an inch or more, then you will need to adjust your sleeve pattern piece as well.
  • You can also use this method to make the shoulder seam wider, by pivoting the opposite direction.

Hope this helps!

~Erin

Play it Safe–Summer Dress Tutorial

A pillowcase dress tutorial. Perfect for summer. But done in a safer way. I don’t mean to be a hater… but drawstrings around necks are not safe and actually have not been allowed by the CPSIA for many years, before all the recent hype. This is why hoodies do not have drawstrings, but elastic instead. Anyway, I completely understand why people prefer the drawstring dresses–they are very cute! They are also much, much faster to make. Even Ottobre has a pattern for one  in an old issue. That said, I prefer this look and don’t mind taking the extra time to sew it.

The main difference is in the  bodice. I use elastic instead of a drawstring, and I use under arm facing to finish the armscye (underarm area); I like how clean and finished it looks. So I’m sure that there are more than enough pillowcase dress tutorials and patterns out there, but not sure that this method is readily available. I’ll share how I do it. I think the end result has more of a vintage feel.

I begin by finding the perfect vintage pillowcase. They are crisp and cool feeling to wear, and many are without side seams, making it even more special. The above dress was made from an antique pillowcase that must never have been used. It still feels new, no stains, holes, and fabric is not worn down at all. The flowers were hand embroidered, and the edge is slightly scalloped.

If you have a pattern use it, but adjust the top–reduce it for a smaller casing. If you don’t have a pattern, no worries. Measure how long you want the dress or top to be. Now measure up from the pillow case hem that amount, plus one inch for the elastic casing.

Use a  straight edge and fabric marker and draw cutting line straight across the width of pillowcase.  Cut along this line. I like to pin parallel to my cutting line, to keep the fabrics together and prevent the fabrics from shifting during my cut.

Now to cut the armscye, or underarm shapes. This need not be perfect, it is a very forgiving design. You will be cutting “J” shapes on each upper corner. For my then 9 year old, my “J” pattern is 3 inches in from the side along the top edge, and 4 inches down along the side. For smaller children, it should be a smaller “J”. Feel free to ask for help on this, as I do have patterns for “J’s” in many sizes that I would be happy to share. If you child has a camisole,  you could use the J on that as a guide to draft a pattern as well.

Finish the underarms (armscyes): Pin single fold  bias tape to underarm “J”– open one of the folds and pin right sides together.

Press bias tape toward seam allowance.

Understitch: Sew a  row of straight stitches close to the fold along the seam allowance/bias tape. This helps the facing to stay on the inside of garment.

Fold bias tape toward inside of garment and press with hot iron. Sew in place.

Fold upper edge 1/4 inch toward wrong side of garment and press. Do this for both front and back. Fold again 5/8 inch for 3/8 inch elastic, or 3/4 inch for 1/2 inch elastic, and press. Stitch close to fold to form casing.

Measure the child’s chest along the front–this is the length of elastic you will use. Place a safety pin on one end of elastic and insert it into casing. Work it through, stopping before the elastic gets sucked up in on the other side. Pin and sew it in place.

Now work the safety pin the rest of the way through. Sew it in place.

Straps: you can use bias tape, folded and sewn.  Sew each strap to top of the “J”. Tie the other ends into knots and you’re done.

Alternative method for the underarms and straps: Do your front and back casings and elastic first. Cut bias tape long enough to cover armscye plus the length of 2 straps. Pin bias tape to dress with the dress sandwiched–placing the center point of bias tape  with the side seam or lowest point of the underarm. Sew the bias tape folded and to the underarm in one step, beginning at one end of strap and ending on the other strap’s end. Repeat for other side.

Well, that’s how I do it 🙂 Hope you like this tutorial and try it sometime. Enjoy the sunshine!

~Erin

Day 3 of Operation Prom

Bodice is nearly complete. Here is a pic of it at the middle of day 3, after ironing the darts and sewing side seams and shoulder seams:

Had my DD try it on for fit when she got home from school and the front looks great. But the back…well…”Mom! It looks like I have back boobs!!” It kind of did. It fit fine along the waist, but the upper part was poofy and well, kind of like it’s supposed to accommodate breasts–what she said. She was freaking out a  little  and my laughing didn’t help. After being reprimanded, I had her put the bodice on inside out and began adjusting the darts.

This is a great technique I learned while making  my “flower girl” dress, when I was a teen. Yes, I was a flower girl at 17. There’s nothing wrong with that.  I made my own flower girl dress: a pretty moire taffeta dress in the style of Lady Di’s wedding dress–screams 80’s. I matched the 7 year old flower girl perfectly and that’s NOT embarrassing at all.  Anyway, I was not alone in that adventure in dress making. I had an older and more experienced seamstress helping me (and making sure the dress looked good enough for her wedding). She showed me this method and it is brilliant.

While wearing the dress (or bodice in this case) inside out, the darts can be  pinned to fit, carefully pinning along the desired sewing line. The pins mimic the sewing line, so one can see what the alteration will look like before sewing.

After all darts and seam lines are pinned and the bodice or dress fits as desired, carefully remove the bodice or dress. New dart lines can be drawn where the pins are. I like to use a ruler to guide my markings. Sew along dart lines and try the bodice dress on to make sure it fits and looks the intended way. If so, tie the thread ends at the point of your darts to secure. If a bodice is very fitted , you may want to reinforce darts with an additional row of stitching.

With the bodice fitted and back boobs removed looking as she wishes it to look, I begin work on the underarm facings and yoke details. The yoke has an interesting construction method and I am ambivalent about it still. The dress has many unfinished aspects, leaving many raw edges exposed, which I am not used to. I also adjusted the yoke band to fit with much less “easing”. The easing was looking more like a gathered flounce and I did not want to bother with spending so much time easing it until it actually  looked eased instead of gathered. After all, prom is in 9 days from today.

The instructions for the bands along the yoke/neckline are a bit much… As you can see in the photo above, the yoke is clipped to the seam allowance at the point where the shoulder and underarm facing meet. Along the front and back of the bodice the seam allowances are trimmed and left as they are shown above. Along the shoulders, it instructs me to trim the middle layer, fold under and stitch the remain two layers together. We’ll see how that goes today.

With each step, I keep thinking there is a better way to do this, a less complicated, more finished looking way. There will be clips and raw edges with the given method and the thought of fraying threads hanging out are haunting me something awful. I’ve soothed myself by thinking it will need to be worn only once, only for several hours really. To me, that seems  irresponsible and wasteful. Not my usual style of doing things.

At the end of day 3,  the bodice fits 🙂 and I have almost completed the lower yoke band. At this point, I’m not sure how the band will stay folded down. I’m having concerns about it flipping up, but will need to see how it falls when dress is more complete and she tries it on for final fittings/hemming. Any thoughts on this?

~Erin

What they don’t tell you…

but should. Why oh why do pattern companies assume sewists know to do the little things? As I was re-reading the instructions for this Vogue pattern–something I always do before moving to the next step and after I’ve paused my sewing, especially when making a more intricate design, to make sure I didn’t overlook or skip something— I noticed the little things were missing. If I had not known to do them, then I would not have done them at all.

Some things may not matter as much, but other little things can make a huge difference. What has my panties in a bunch specifically right now: dart construction. The Vogue instructions say: sew darts <period>  no additional help or technique??!? Really?
When sewing darts, it’s really important to tie the thread ends together at the point of your dart. Especially since I am trimming the seam allowances of said darts per the instructions.

To sew a dart, one sews off the fabric at the upper point of the dart. If the threads are left, they may come undone, and so will your dart. Not-so-pretty looking, imho. I’m sure my DD would not want to experience this at prom either.

To avoid this fashion malfunction, leave the threads long, and tie them together into a knot. Not such a big thing, but can keep your dress or blouse from looking unfortunate. So why don’t they include this information in the instructions? Pattern companies should not make assumptions about the sewist’s knowledge base, and they should do all they can to help the sewist to succeed. In this situation, less is not more. Information is a good thing–knowledge is power. Badly done, Vogue.